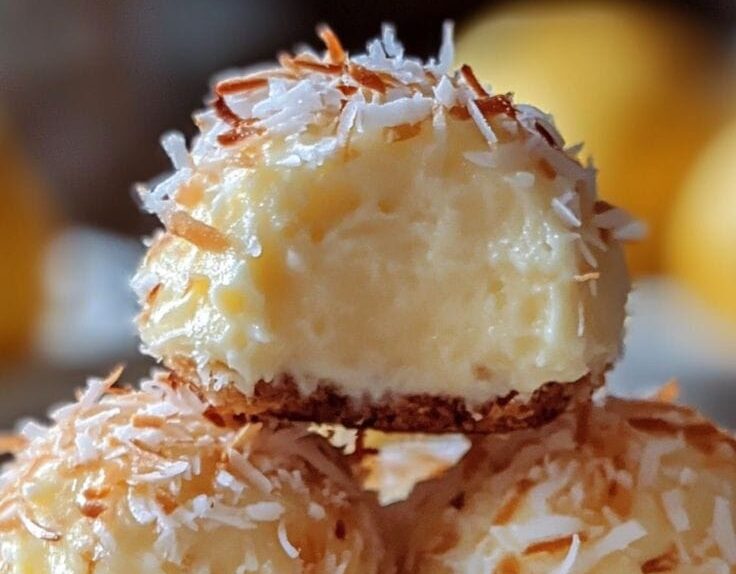

The Ultimate No-Bake Fantasy Cheesecake (Ready in Just 15 Minutes!)
🍰 A Cheesecake That Changed Everything
Last Thanksgiving, I was in full panic mode. Twenty guests were arriving in four hours, and my oven decided to quit on me right before I could bake dessert. That’s when I remembered my grandmother’s secret: the best cheesecakes don’t always need an oven. I threw together this no-bake fantasy cheesecake, and honestly? It became the star of the dinner. Three people asked for the recipe before they even finished their slice. Sometimes the best recipes are born from pure chaos!

What Makes This Cheesecake So Special?
This easy no-bake cheesecake recipe is a total game-changer for busy home cooks and dessert lovers alike. Unlike traditional baked cheesecakes that require precise temperatures and hours of your time, this version comes together in about 15 minutes of active prep. The secret? A buttery graham cracker crust paired with an ultra-creamy filling that sets beautifully in the fridge—no water bath, no cracking, no stress.
Whether you’re planning a last-minute dinner party, celebrating a birthday, or just craving something sweet and indulgent, this American-style cheesecake delivers bakery-quality results without the bakery-level effort. Plus, it’s completely customizable with your favorite toppings, from fresh berries to chocolate ganache.
📝 Ingredients
For the Crust:
- 2 cups graham cracker crumbs (about 16 full crackers)
- 7 tablespoons unsalted butter, melted
- 2 tablespoons granulated sugar
- Pinch of salt
For the Creamy Filling:
- 32 oz (4 blocks) cream cheese, softened to room temperature
- 1 cup heavy whipping cream, cold
- ¾ cup granulated sugar (adjust to taste)
- 3 large eggs, room temperature
- 2 teaspoons pure vanilla extract
- 2 tablespoons cornstarch or instant vanilla pudding mix
- 3.5 oz white chocolate chips, melted and slightly cooled (optional but amazing!)
For the Toppings (Choose Your Favorite!):
- Chocolate ganache or store-bought chocolate sauce
- Fresh seasonal berries (strawberries, raspberries, blueberries)
- Chocolate shavings or toasted nuts
- Whipped cream for serving
👩🍳 Step-by-Step Instructions
Step 1: Create That Perfect Crust
Grab your food processor and pulse those graham crackers until they’re fine crumbs—think sand-like texture. No food processor? No problem! Just seal the crackers in a ziplock bag and go to town with a rolling pin (great stress relief, by the way).
Mix the crumbs with melted butter, sugar, and a tiny pinch of salt until everything looks like wet sand. Press this mixture firmly into the bottom of a 9-inch springform pan lined with parchment paper. Use the bottom of a measuring cup to really pack it down—you want a solid base that won’t crumble. Pop it in the fridge for 20 minutes while you make the filling.
Step 2: Whip Up That Dreamy Filling
In a large mixing bowl, beat the softened cream cheese with an electric mixer until it’s completely smooth and fluffy—about 2-3 minutes. This step is crucial! Any lumps now will stay lumps later, so take your time.
Add the heavy cream, sugar, and vanilla extract. Beat on medium speed until everything is silky smooth. Now comes the fun part: add your eggs one at a time, mixing gently after each addition. Don’t overmix here—we want creamy, not foamy.
Sprinkle in the cornstarch and give it one last gentle mix. If you’re feeling fancy, fold in that melted white chocolate now. Trust me, it adds an incredible richness that’ll make people think you went to culinary school.
Step 3: Assemble and Chill
Pour your gorgeous filling over the chilled crust. Use a spatula to smooth the top—it doesn’t have to be perfect, but it should be relatively even.
Here’s where patience pays off: cover the pan with plastic wrap and refrigerate for at least 4 hours. Overnight is even better if you can wait (I know, it’s torture). The cheesecake needs this time to set properly and develop those incredible flavors.
Step 4: The Grand Finale
Right before serving, add your toppings. I love drizzling warm chocolate ganache over the top and letting it cascade down the sides. Then scatter fresh berries on top for that pop of color. It’s like edible art!
Run a knife under hot water, dry it, and use it to slice clean pieces. Wipe the knife between cuts for those Instagram-worthy slices.
💡 Pro Tips & Chef’s Notes
Room Temperature is Key: Seriously, don’t skip bringing your cream cheese and eggs to room temperature. Cold cream cheese = lumpy filling. Set them out about an hour before you start.
The Tap Test: Not sure if your crust is packed enough? Gently tap the pan on the counter. If crumbs move around, press harder!
Flavor Boost: Add a tablespoon of amaretto liqueur or lemon zest to the filling for an adult twist. For kids’ parties, stick with extra vanilla—it’s always a winner.
Make-Ahead Magic: This cheesecake actually tastes BETTER the next day after the flavors have married in the fridge. Make it the night before your event and thank yourself later.
Serving Trick: Let the cheesecake sit at room temperature for 10-15 minutes before slicing. It’ll cut like butter and taste even creamier.
Budget-Friendly: Can’t find white chocolate? Skip it! The cheesecake is still absolutely delicious without it.
📊 Nutrition Facts (Per Slice, Based on 12 Servings)
- Calories: 420
- Protein: 7g
- Total Fat: 32g
- Saturated Fat: 18g
- Carbohydrates: 28g
- Sugar: 22g
- Cholesterol: 145mg
- Sodium: 280mg
- Fiber: 0g
Note: Nutritional values are approximate and will vary based on specific ingredients and toppings used.
🎉 Let’s Talk Cheesecake!
There you have it—the easiest homemade cheesecake recipe that’ll make you look like a dessert superstar without breaking a sweat. This is one of those recipes that’ll become your go-to for every potluck, holiday gathering, and “I need something sweet RIGHT NOW” moment.
The best part? Once you master this base recipe, you can customize it endlessly. Try swirling in some raspberry puree, mixing in crushed Oreos, or going full chocolate by using chocolate graham crackers and cocoa powder in the filling. The possibilities are literally endless!
Have you tried making this fantasy cheesecake yet? Drop a comment below and let me know what toppings you used! And if you loved this recipe, share it with your fellow dessert lovers—they’ll thank you for it.
Don’t forget to snap a photo and tag us on social media. I absolutely love seeing your beautiful creations!
Happy baking (well, non-baking!)! 🍰✨