Rich Chocolate Layer Cake (Pastry Shop Style) – A Decadent Triple-Layer Masterpiece
Rating: ⭐⭐⭐⭐⭐ (4.9/5 from 1,142 reviews)
Prep Time: 30 minutes | Bake Time: 45 minutes | Cooling Time: 1 hour | Assembly Time: 20 minutes | Chill Time: 3 hours | Total Time: 5 hours 35 minutes
Servings: 12-14 slices | Difficulty: Medium
Description

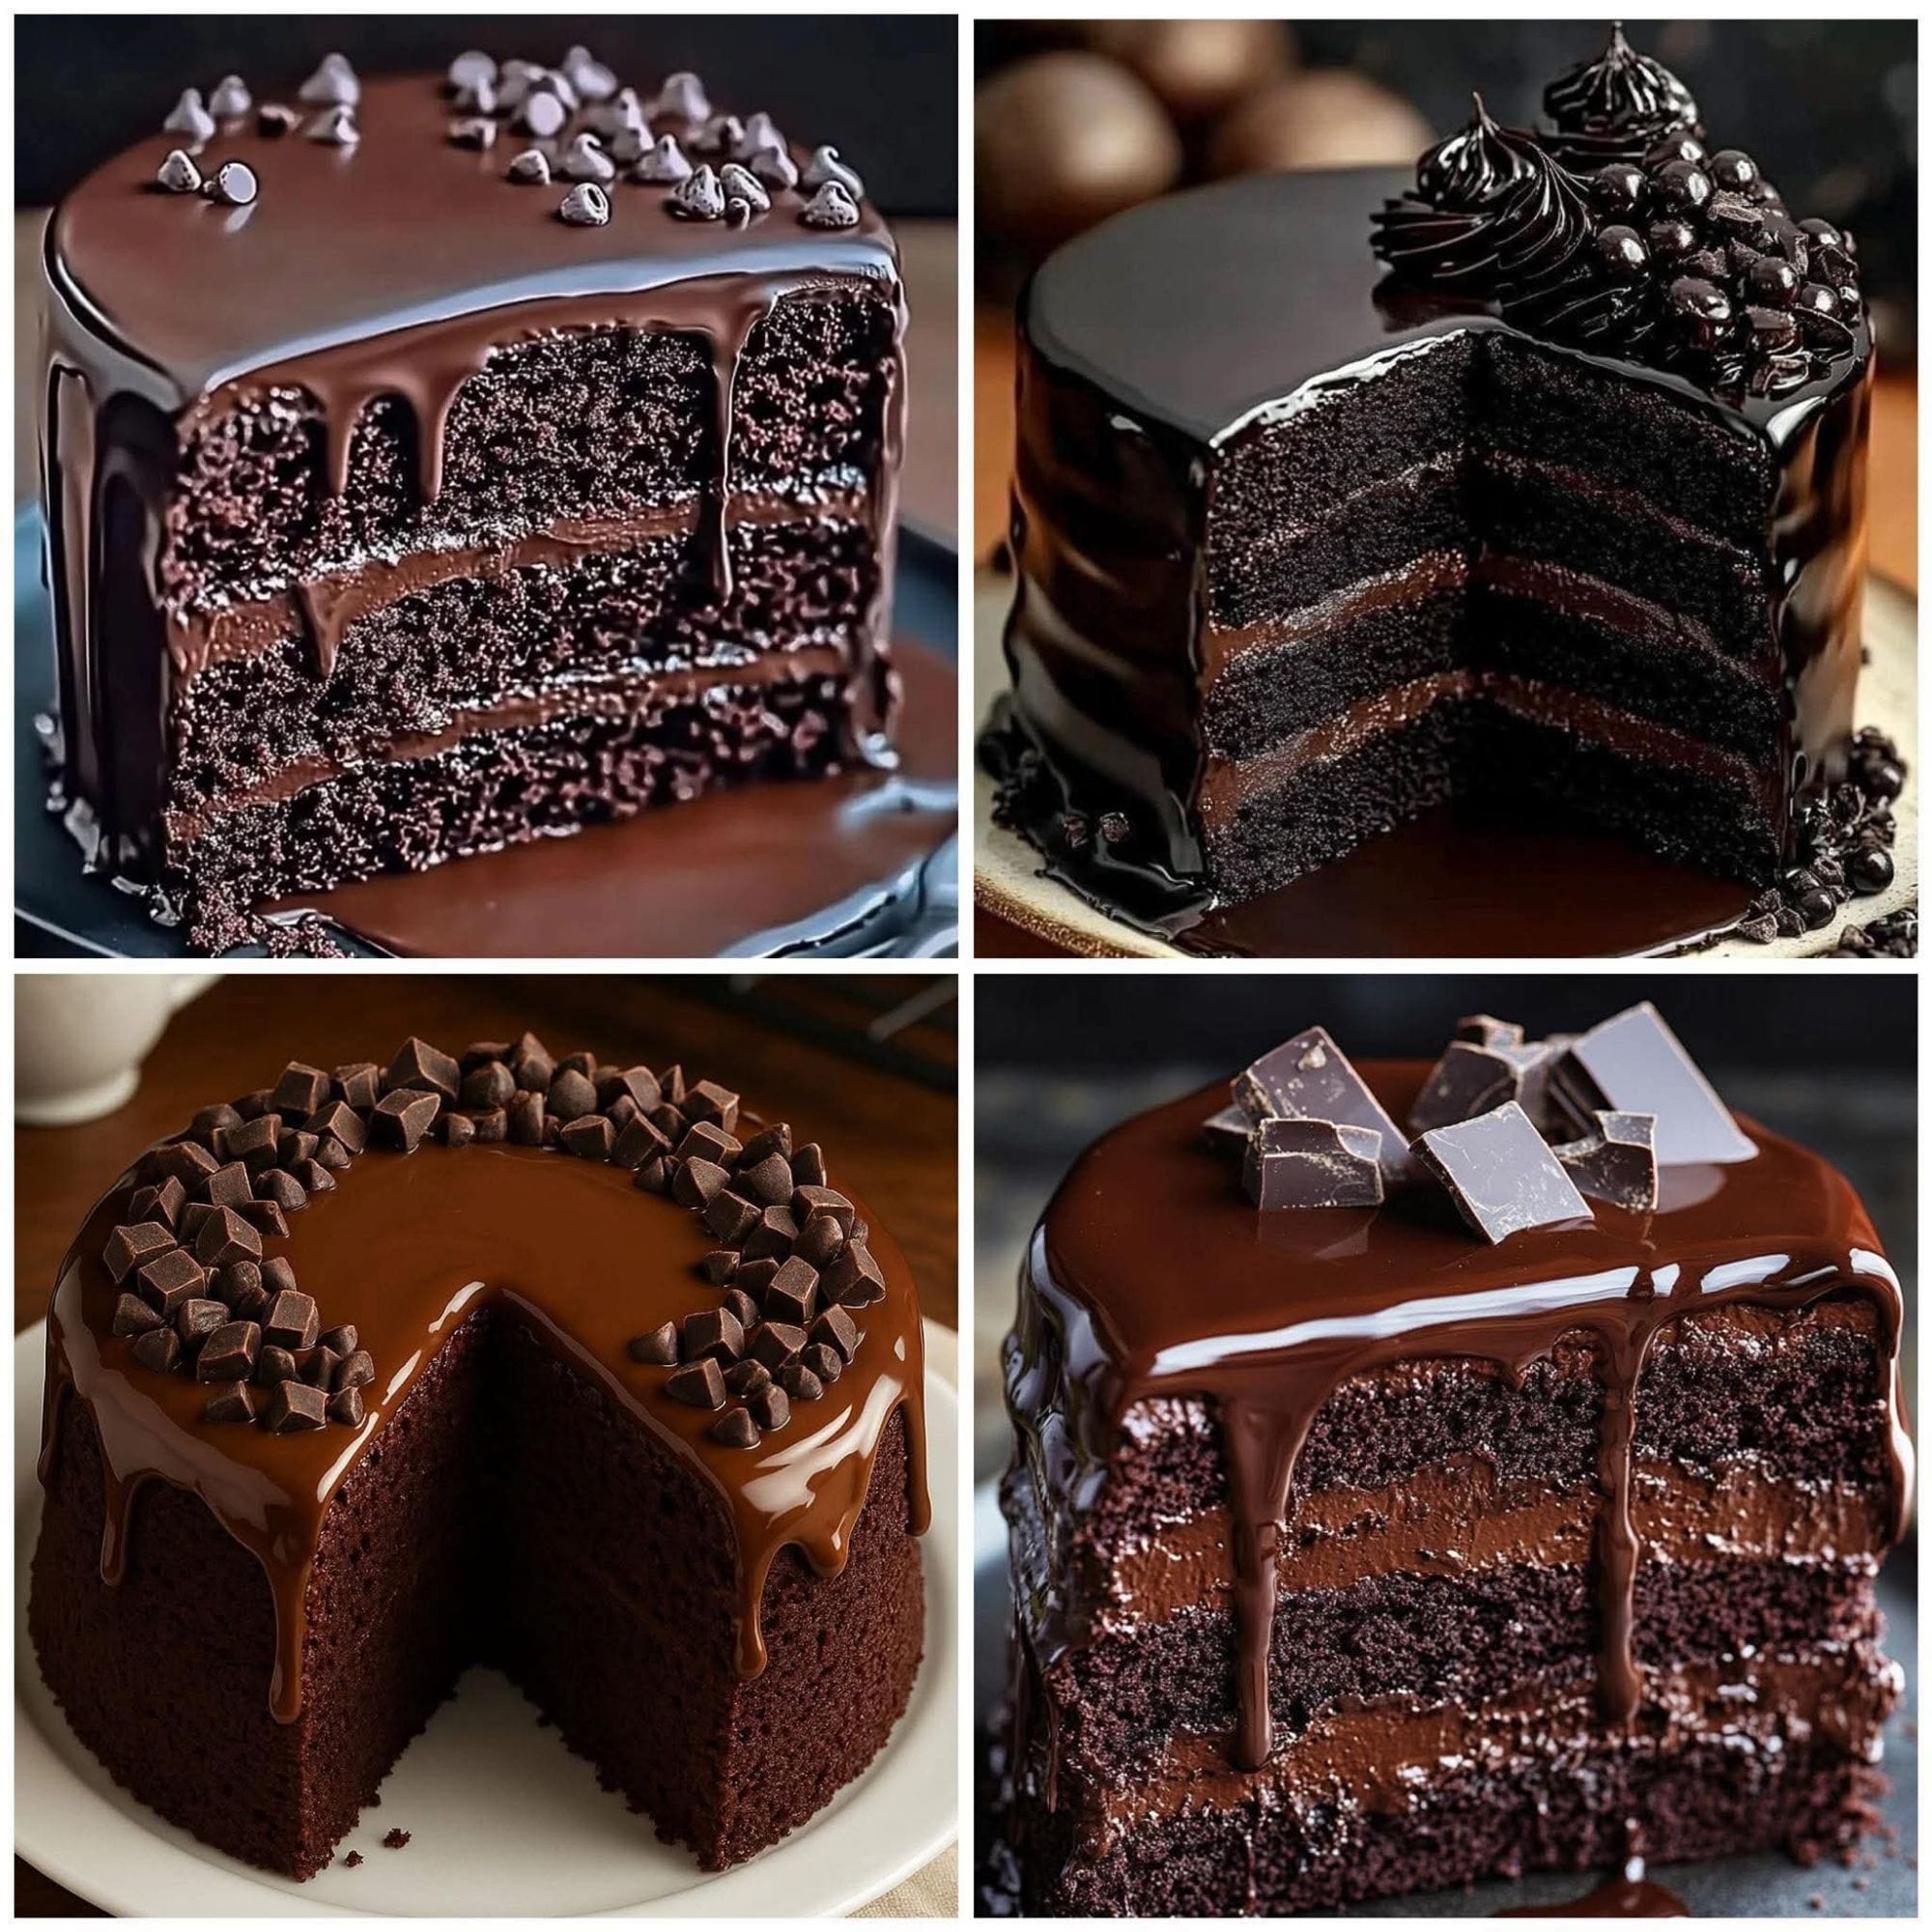
This Rich Chocolate Layer Cake is the kind of show-stopping dessert you’d find in an upscale European pastry shop. With three layers of moist, tender chocolate cake, luxurious chocolate cream filling, and a glossy dark chocolate ganache cascading down the sides, this is chocolate heaven on a plate. The cake itself is incredibly soft and fluffy, made with a combination of cocoa powder and melted dark chocolate for deep, complex flavor. The whipped chocolate cream filling is light yet rich, perfectly complementing the cake layers. Finally, the silky ganache topping adds an elegant finish that makes every slice look professionally crafted. Whether you’re celebrating a birthday, anniversary, or simply indulging your chocolate cravings, this pastry shop-style cake delivers bakery-quality results right from your home kitchen.
Ingredients

For the Cake (20-22 cm / 8-9 inch round pan):
- 3 large eggs, at room temperature
- 1 ½ cups granulated sugar
- 1 cup whole milk, at room temperature
- ½ cup vegetable oil
- 2 tablespoons plain yogurt
- 2 tablespoons unsweetened cocoa powder
- 2 cups all-purpose flour
- 1 packet (2 ¼ teaspoons) baking powder
- 1 packet (1 tablespoon) vanilla extract or 1 teaspoon vanilla powder
- 80 g (3 oz) dark chocolate, melted and slightly cooled (optional but highly recommended)
For the Chocolate Cream Filling:
- 1 packet (about 2 oz) powdered whipped cream or 1 cup heavy whipping cream
- 1 cup cold whole milk
- 100 g (3.5 oz) cream cheese, softened to room temperature
- 2 tablespoons unsweetened cocoa powder
- 80 g (3 oz) dark chocolate, melted and cooled
For the Ganache Topping:
- 200 ml (¾ cup + 2 tablespoons) heavy cream
- 200 g (7 oz) dark chocolate, chopped into small pieces
For Decoration (Optional):
- Chocolate shavings
- Chocolate chips
- Chocolate truffles
- Fresh berries
- Edible gold leaf
For Soaking Syrup (Optional but recommended for extra moisture):
- 3-4 tablespoons milk
- 1 tablespoon cocoa powder
- 1 tablespoon sugar
Instructions
Step 1: Prepare the Cake Batter
Preheat your oven to 340°F (170°C). Grease a 20-22 cm round cake pan with butter or cooking spray, then line the bottom with parchment paper. In a large mixing bowl, beat the eggs and granulated sugar together with an electric mixer on high speed for about 5-7 minutes until the mixture becomes pale, thick, and fluffy. The mixture should fall in ribbons when you lift the beaters. This step is crucial for creating a light, airy cake texture.
Step 2: Add Wet Ingredients
Reduce the mixer speed to medium-low. Add the milk, vegetable oil, and yogurt to the egg mixture, beating until well combined. If using, add the melted and slightly cooled dark chocolate at this stage and mix until evenly incorporated. The chocolate adds incredible depth of flavor and makes the cake even more moist.
Step 3: Incorporate Dry Ingredients
In a separate bowl, sift together the flour, cocoa powder, baking powder, and vanilla. Sifting ensures there are no lumps and helps create a lighter texture. Gradually add the dry ingredients to the wet mixture, folding gently with a spatula using a figure-eight motion. Mix just until no flour streaks remain. Be careful not to overmix as this can make the cake tough. The batter should be smooth and pourable.
Step 4: Bake the Cake
Pour the batter into your prepared pan, smoothing the top with a spatula. Tap the pan gently on the counter a few times to release any air bubbles. Bake in the preheated oven for 40-45 minutes, or until a toothpick inserted into the center comes out clean or with just a few moist crumbs. The top should spring back when lightly pressed. Don’t open the oven door for at least the first 30 minutes to prevent the cake from sinking.
Step 5: Cool the Cake
Remove the cake from the oven and let it cool in the pan for 10 minutes. Run a knife around the edges to loosen, then carefully invert onto a wire cooling rack. Peel off the parchment paper and let the cake cool completely, at least 1 hour. This is important because cutting or frosting a warm cake will cause it to crumble and the frosting to melt.
Step 6: Prepare the Chocolate Cream Filling
While the cake cools, make your chocolate cream. If using powdered whipped cream, whip it with the cold milk according to package directions until stiff peaks form. If using regular heavy cream, whip the cream alone until stiff peaks form. In a separate bowl, beat the softened cream cheese until smooth and creamy. Add the cocoa powder and melted, cooled chocolate to the cream cheese, mixing until well combined. Gently fold the whipped cream into the chocolate-cream cheese mixture using a spatula, being careful not to deflate it. The cream should be thick, smooth, and spreadable. Refrigerate until ready to use.
Step 7: Prepare the Ganache
In a small saucepan, heat the heavy cream over medium heat until it just begins to simmer, with small bubbles forming around the edges. Do not let it boil. Remove from heat and add the chopped dark chocolate. Let it sit undisturbed for 2-3 minutes to allow the chocolate to melt. Then whisk gently until completely smooth and glossy. Let the ganache stand at room temperature for about 5 minutes to thicken slightly before using. If it becomes too thick, you can gently rewarm it.
Step 8: Prepare Soaking Syrup (Optional)
For an extra moist cake with even more chocolate flavor, mix together the milk, cocoa powder, and sugar in a small bowl until the sugar dissolves. This simple syrup will be brushed on each cake layer before adding the cream.
Step 9: Slice the Cake into Layers
Once the cake is completely cool, use a long serrated knife to carefully cut it horizontally into 3 equal layers. A cake leveler makes this easier, but a knife works fine. To ensure even layers, you can measure and mark the sides with toothpicks as guides. Take your time with this step as even layers make for a more professional-looking final cake.
Step 10: Assemble the Cake
Place the bottom cake layer on your serving plate or cake stand. If using the soaking syrup, brush it lightly and evenly over the layer. Don’t oversoak or the cake will become mushy. Spread a generous amount of chocolate cream filling over the layer, about ½ to ¾ inch thick, using an offset spatula to spread it evenly to the edges. Place the second cake layer on top and repeat the process with soaking syrup and cream. Finally, add the third layer, flat side up for a smooth top surface.
Step 11: Apply the Ganache
Make sure your ganache is at the right consistency, slightly warm and pourable but thick enough to coat. Pour the ganache over the center of the top layer, using a spatula to gently push it toward the edges, allowing it to naturally drip down the sides. You can control the drips by how much ganache you push to the edges. Work quickly as ganache sets as it cools. If desired, spread a thin layer around the sides as well for complete coverage.
Step 12: Decorate and Chill
While the ganache is still slightly soft, add your decorations. Chocolate shavings, chips, or truffles look beautiful arranged on top. You can also pipe any remaining chocolate cream around the edges or add fresh berries for color contrast. Carefully transfer the cake to the refrigerator and chill for at least 2-3 hours, or overnight, to allow all the layers to set properly and flavors to meld together.
Step 13: Serve
Remove the cake from the refrigerator about 20-30 minutes before serving to bring it closer to room temperature for the best flavor and texture. Use a sharp knife dipped in hot water and wiped dry between each slice for clean, beautiful cuts. Serve and watch everyone’s eyes light up when they see those gorgeous layers!
Notes
Make-Ahead Instructions:
The cake layer can be baked up to 2 days ahead, wrapped tightly in plastic wrap, and stored at room temperature. For longer storage, freeze the wrapped cake layer for up to 3 months. The chocolate cream can be made 1 day ahead and stored covered in the refrigerator. Give it a quick whip before using if it has separated. The fully assembled cake is actually better when made a day ahead as the flavors develop and the layers settle together beautifully.
Substitutions:
If you don’t have yogurt, substitute with an equal amount of sour cream or additional milk. Plain Greek yogurt also works wonderfully and adds extra moisture. Vegetable oil can be replaced with melted coconut oil or canola oil. For the powdered whipped cream, you can use regular heavy cream whipped to stiff peaks. If you don’t have cream cheese, you can make the filling with just whipped cream and melted chocolate, though it will be lighter and less stable.
Storage:
Store the cake covered in the refrigerator for up to 5 days. The cake actually improves over the first 2 days as the moisture distributes throughout and flavors deepen. Bring to room temperature before serving for the best taste and texture. You can freeze unfrosted cake layers for up to 3 months wrapped tightly. The fully frosted cake doesn’t freeze as well due to the cream filling.
Dietary Modifications:
For a gluten-free version, substitute the all-purpose flour with a 1:1 gluten-free baking blend. The texture may be slightly different but still delicious. This cake is not easily adapted to be dairy-free due to the multiple dairy components in both the cake and fillings.
Nutrition Information
Per Serving (1/12 of cake):
Calories: 545 • Total Fat: 32g • Saturated Fat: 15g • Cholesterol: 85mg • Sodium: 145mg • Total Carbohydrates: 62g • Dietary Fiber: 3g • Sugars: 42g • Protein: 7g
Note: Nutrition information is an estimate and will vary based on exact ingredients used and portion sizes.
Tips for Success
1. Room Temperature Ingredients: Eggs, milk, and yogurt should all be at room temperature for proper mixing and the best texture. Cold eggs won’t incorporate as much air when beaten.
2. Don’t Skip the Egg Beating: Beating the eggs and sugar until pale and fluffy is what gives this cake its light, airy texture. This takes about 5-7 minutes and is worth every second.
3. Fold, Don’t Stir: When adding the dry ingredients, use a folding motion with a spatula rather than stirring vigorously. This prevents overmixing and keeps the batter light.
4. Cool Chocolate Before Adding: Make sure your melted chocolate has cooled to lukewarm before adding it to the batter or cream. Hot chocolate can deflate your whipped ingredients or scramble the eggs.
5. Level Your Layers: Use a serrated knife and take your time cutting even layers. Uneven layers will show in the final cake and make it harder to frost.
6. Chill Between Steps: If your chocolate cream starts getting too soft while assembling, pop it in the fridge for 10 minutes to firm up. Same with the ganache if it’s too runny.
7. Perfect Ganache Consistency: Your ganache should be slightly warm and pourable but thick enough to coat the back of a spoon. If it’s too thin, let it cool a bit longer. Too thick? Gently rewarm it.
8. Sharp Knife for Slicing: A long, sharp knife dipped in hot water and wiped clean between each cut gives you those bakery-perfect slices.
9. Quality Chocolate Matters: Since chocolate is the star here, use good quality dark chocolate with at least 60% cocoa content for the best flavor.
10. Don’t Skip the Chill Time: The cake needs at least 2-3 hours in the fridge for the layers to set and the flavors to come together. Overnight is even better.
Reviews
⭐⭐⭐⭐⭐ Maria S. – December 2024
“This is hands down the best chocolate cake I’ve ever made! It tastes exactly like something from a fancy European bakery. Everyone at my daughter’s birthday party couldn’t stop raving about it. The layers were so moist and the ganache was perfection!”
⭐⭐⭐⭐⭐ David L. – November 2024
“I’m not usually a baker but this recipe was surprisingly easy to follow. The instructions were clear and the cake turned out amazing on my first try. My wife said it’s better than any cake she’s had from a bakery!”
⭐⭐⭐⭐⭐ Sofia R. – October 2024
“Absolutely stunning cake! I made it for my mom’s 60th birthday and she cried when she saw it. The chocolate cream filling is incredible – not too sweet, perfectly chocolatey. I used the soaking syrup and it made the cake incredibly moist. Will make this again and again!”
⭐⭐⭐⭐⭐ James K. – September 2024
“This recipe is a keeper! The cake is so fluffy and moist, and the combination of the three components is just perfect. I decorated it with chocolate truffles on top and it looked like it came from a professional bakery. Everyone asked for the recipe!”
⭐⭐⭐⭐⭐ Elena P. – August 2024
“Made this for my husband’s birthday and it was a huge hit! The ganache drips looked so professional. I was nervous about cutting the cake into three layers but it was easier than I thought. The taste is unbelievable – rich, chocolatey, and not too sweet. This is now my go-to special occasion cake!”
Frequently Asked Questions
Can I make this cake in a different size pan?
Yes! For a larger cake, use two 9-inch pans and divide the batter between them. Baking time will be slightly less, about 30-35 minutes. For cupcakes, this recipe makes about 24 and bakes in 18-22 minutes at the same temperature.
Why did my cake layers come out dry?
This usually happens from overbaking. Check your cake at 40 minutes and remove when a toothpick comes out with a few moist crumbs, not completely clean. Also make sure you’re not using too much flour. The soaking syrup helps add extra moisture if needed.
My ganache is too thick and won’t pour. What should I do?
Gently rewarm the ganache in 10-second bursts in the microwave or over a double boiler, stirring after each interval, until it reaches a pourable consistency. If it’s still too thick, add a tablespoon of warm cream at a time.
Can I use milk chocolate instead of dark chocolate?
You can, but the flavor will be much sweeter and less intense. Dark chocolate with 60-70% cocoa content provides the best balance of sweetness and rich chocolate flavor that makes this cake special.
The chocolate cream filling is too soft and won’t stay between layers. Help!
Make sure you whipped your cream to stiff peaks before folding it into the chocolate mixture. If it’s still too soft, refrigerate the cream for 20-30 minutes to firm up before assembling. Also ensure your cream cheese was at room temperature when mixing.
How do I cut perfect even layers?
Measure the height of your cake and divide by three. Mark the sides with toothpicks at those intervals all around the cake. Use a long serrated knife and follow the toothpick guides, sawing gently in a back-and-forth motion while slowly rotating the cake.
Can I skip the soaking syrup?
Yes, the cake is moist enough without it. The soaking syrup is optional and just adds extra moisture and chocolate flavor. If your cake seems a bit dry or you want it extra moist like some European cakes, use it.
My cake sank in the middle while baking. Why?
This can happen if the oven temperature is too high, the oven door was opened too early, or the batter was overmixed. Make sure your oven is properly calibrated and avoid opening the door for at least the first 30 minutes of baking.
How far ahead can I make this cake?
The cake is actually better when made a day ahead as the flavors meld and the layers settle together. You can make it up to 2 days ahead and store covered in the refrigerator. Just add final decorations the day of serving if desired.
Can I freeze this cake?
You can freeze the baked and cooled cake layer (unfrosted) for up to 3 months wrapped tightly. The fully assembled cake with cream filling doesn’t freeze as well, as the texture of the whipped cream will change when thawed.
Indulge in this pastry shop-worthy chocolate masterpiece! 🍰🍫✨