
Easy & Quick Hazelnut Cake Recipe: A Classic Homemade Treat
Prep Time: 18 minutes
Cook Time: 1 hour
Total Time: 1 hour 18 minutes
Servings: 12 servings
Dietary: Vegetarian

This Easy Hazelnut Cake is a timeless classic that brings rich, nutty flavor to your table with minimal effort. The star of this recipe is toasted hazelnuts, which add depth and a beautiful aroma to a tender, buttery cake. Whether you’re looking for a simple afternoon treat to enjoy with coffee or an elegant dessert for a special celebration, this versatile cake fits any occasion. Dust it with powdered sugar for simplicity, or dress it up with ganache and cream for something truly spectacular.
Why This Recipe Works
Hazelnuts have a naturally sweet, rich flavor that intensifies beautifully when toasted. This cake celebrates that flavor without being overly complicated or requiring special techniques. The ground hazelnuts not only add taste but also create a moist, tender crumb that stays fresh for days.
Unlike some nut-based cakes that can be dense or heavy, this recipe strikes the perfect balance—it’s light enough to enjoy as an everyday treat but substantial enough to feel special. The cake is forgiving for beginner bakers while still impressive enough to serve at gatherings or give as a homemade gift.
Ingredients

For the Cake:
- 1 1/2 cups (200g) hazelnuts, toasted and skinned
- 1 3/4 cups (220g) all-purpose flour
- 2 teaspoons baking powder
- 1/2 teaspoon salt
- 3/4 cup (170g) unsalted butter, softened
- 1 1/4 cups (250g) granulated sugar
- 4 large eggs, room temperature
- 2 teaspoons vanilla extract
- 1/2 cup (120ml) whole milk, room temperature
- Zest of 1 lemon (optional, for brightness)
For Topping (Optional):
- Powdered sugar for dusting
- Chocolate ganache
- Whipped cream
- Fresh berries
- Chopped toasted hazelnuts
Instructions

Step 1: Toast and Prepare the Hazelnuts
Preheat your oven to 350°F (175°C). Spread the hazelnuts on a baking sheet in a single layer and toast for 10-12 minutes, shaking the pan halfway through, until fragrant and the skins begin to crack. The hazelnuts should be golden brown but not burnt.
Remove from the oven and immediately wrap the hot hazelnuts in a clean kitchen towel. Let them steam for 5 minutes, then rub vigorously in the towel to remove most of the skins. Don’t worry if some skin remains—it adds character and won’t affect the taste.
Let the hazelnuts cool completely, then pulse them in a food processor until finely ground, almost like coarse flour. Be careful not to over-process or you’ll end up with hazelnut butter! Set aside.
Step 2: Prepare the Pan and Oven
Keep your oven at 350°F (175°C). Grease a 9-inch round cake pan (or 9-inch springform pan) generously with butter, then dust with flour, tapping out any excess. You can also line the bottom with parchment paper for extra insurance.
Step 3: Mix the Dry Ingredients
In a medium bowl, whisk together the flour, baking powder, salt, and ground hazelnuts. Make sure the hazelnuts are evenly distributed throughout the flour mixture. Set aside.
Step 4: Cream the Butter and Sugar
In a large mixing bowl, using an electric mixer on medium-high speed, beat the softened butter and sugar together for 3-4 minutes until light, fluffy, and pale in color. This step is crucial for creating a tender cake, so don’t rush it. The mixture should increase in volume and look almost white.
Step 5: Add the Eggs and Vanilla
Add the eggs one at a time, beating well after each addition. The mixture should look smooth and combined after each egg. Add the vanilla extract (and lemon zest if using) and mix until incorporated. Don’t worry if the mixture looks slightly curdled—it will come together when you add the flour.
Step 6: Combine Wet and Dry Ingredients
With the mixer on low speed, add the flour-hazelnut mixture in three additions, alternating with the milk in two additions. Begin and end with the dry ingredients. The pattern should be: flour mixture, milk, flour mixture, milk, flour mixture.
Mix each addition just until incorporated—overmixing can lead to a tough cake. The final batter should be smooth, thick, and creamy.
Step 7: Bake the Cake
Pour the batter into your prepared pan and smooth the top with a spatula. Tap the pan gently on the counter a few times to release any air bubbles.
Bake for 45-55 minutes, or until a toothpick inserted into the center comes out clean or with just a few moist crumbs. The top should be golden brown and spring back lightly when touched. Start checking at 45 minutes to avoid overbaking.
Step 8: Cool and Serve
Let the cake cool in the pan for 15 minutes, then carefully turn it out onto a wire rack to cool completely. If the cake sticks, run a knife around the edges before inverting.
Once completely cool, dust with powdered sugar, or top with your choice of frosting, ganache, or whipped cream.
Tips for Perfect Hazelnut Cake
Toast for Maximum Flavor: Don’t skip toasting the hazelnuts! This step is what gives the cake its deep, rich flavor. Raw hazelnuts won’t deliver the same delicious results.
Room Temperature Ingredients: Make sure your butter, eggs, and milk are at room temperature. This helps create a smooth batter and a more even crumb.
Don’t Over-Grind: When grinding the hazelnuts, pulse in short bursts and check frequently. You want a fine, flour-like consistency, not hazelnut butter. If the nuts start clumping, you’ve gone too far.
Measure Flour Correctly: Spoon flour into your measuring cup and level it off with a knife. Scooping directly from the bag can pack too much flour into the cup, leading to a dry cake.
Test for Doneness: Ovens vary, so start checking your cake at 45 minutes. The cake is done when a toothpick comes out clean or with just a few moist crumbs, and the edges pull away slightly from the pan.
Cool Completely Before Frosting: If you plan to frost or glaze your cake, make sure it’s completely cool. A warm cake will melt frosting and make it slide off.
Flavor Variations
Chocolate Hazelnut Cake: Add 1/4 cup cocoa powder to the dry ingredients and reduce flour by 1/4 cup. Top with chocolate ganache for a homemade Nutella-style cake.
Orange Hazelnut: Replace lemon zest with orange zest and add 1 teaspoon orange extract. Pair with an orange glaze for a sophisticated flavor combination.
Coffee Hazelnut: Dissolve 2 tablespoons instant espresso powder in the milk before adding. The coffee enhances the hazelnut flavor beautifully.
Hazelnut Almond: Replace half the hazelnuts with toasted almonds for a different nutty profile.
Spiced Hazelnut: Add 1 teaspoon cinnamon and 1/4 teaspoon nutmeg to the dry ingredients for a warmly spiced cake perfect for fall.
Serving Suggestions
Simple Elegance: Dust generously with powdered sugar and serve with afternoon tea or coffee.
Chocolate Ganache: Pour warm chocolate ganache over the cooled cake and let it drip down the sides. Top with whole toasted hazelnuts.
Whipped Cream & Berries: Serve slices with a dollop of whipped cream and fresh raspberries or strawberries.
Layered Cake: Slice the cake horizontally into two layers and fill with buttercream, pastry cream, or hazelnut spread. Frost the outside for a celebration-worthy dessert.
Ice Cream Pairing: Serve warm slices with vanilla or hazelnut gelato for an indulgent dessert.
Hazelnut Praline: Top with crushed hazelnut praline for extra crunch and sweetness.
Storage
Room Temperature: Store the unfrosted cake in an airtight container at room temperature for up to 3 days. The cake actually improves on day two as the flavors develop.
Refrigerator: If frosted with cream-based frosting, store covered in the fridge for up to 5 days. Bring to room temperature before serving for the best flavor.
Freezer: Wrap the cooled, unfrosted cake tightly in plastic wrap, then in aluminum foil. Freeze for up to 3 months. Thaw overnight in the refrigerator or at room temperature for a few hours.
Individual Slices: Wrap individual slices in plastic wrap for easy grab-and-go treats. They thaw quickly and make perfect lunchbox additions.
Frosting and Topping Ideas
Chocolate Ganache:
Heat 1 cup heavy cream until simmering, pour over 8 oz chopped chocolate, let sit 2 minutes, then stir until smooth. Pour over cooled cake.
Hazelnut Buttercream:
Beat 1 cup softened butter until fluffy, add 3 cups powdered sugar gradually, then beat in 1/4 cup hazelnut spread and 2 tablespoons cream.
Cream Cheese Frosting:
Beat 8 oz softened cream cheese with 1/2 cup softened butter, add 3 cups powdered sugar and 1 teaspoon vanilla. Perfect tangy complement to the nutty cake.
Simple Glaze:
Mix 1 1/2 cups powdered sugar with 2-3 tablespoons milk and 1/2 teaspoon vanilla. Drizzle over cooled cake.
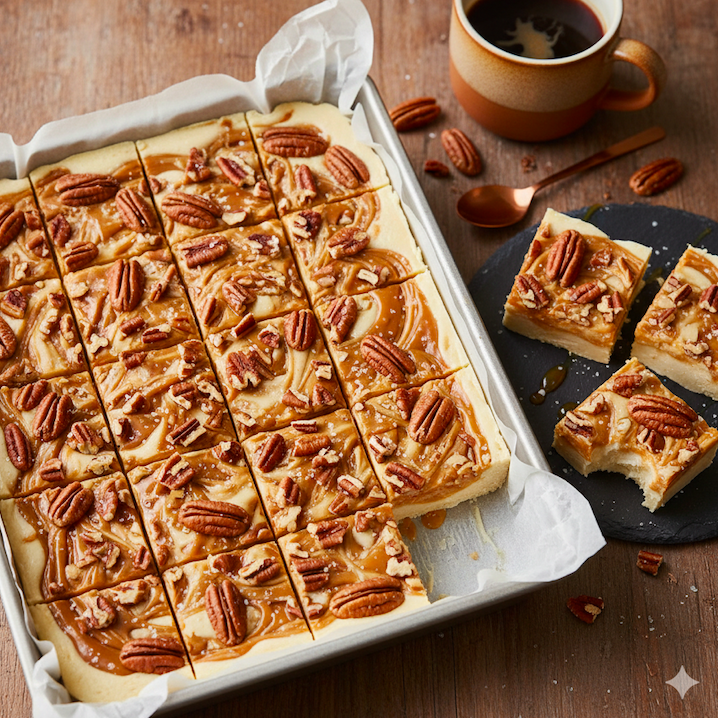
Caramel Drizzle:
Top with store-bought or homemade salted caramel sauce and sprinkle with flaky sea salt.
Making It Special
For Birthdays: Make two cakes and stack them with frosting between the layers. Decorate with whole hazelnuts and fresh flowers.
For Holidays: Add seasonal spices like cinnamon and ginger, and top with cranberries and rosemary for a festive look.
For Gifts: Bake in small loaf pans instead of a round pan. Wrap cooled loaves in parchment paper and tie with twine for beautiful homemade gifts.
For Coffee Time: Cut into small squares or wedges and serve on a pretty platter with coffee or tea for afternoon entertaining.
Troubleshooting
Cake is dry: You may have overbaked it or used too much flour. Check your oven temperature with an oven thermometer and measure flour carefully.
Cake sank in the middle: The oven temperature may have been too high, or you opened the oven door too early. Wait until at least 40 minutes before checking.
Nuts are bitter: The hazelnuts were over-toasted. Toast only until fragrant and golden, not dark brown.
Cake stuck to pan: Make sure to grease and flour the pan well, or use parchment paper on the bottom. Let the cake cool for 15 minutes before attempting to remove it.
Dense texture: The butter and sugar weren’t creamed long enough, or you overmixed the batter after adding flour. Cream for a full 3-4 minutes and fold in flour gently.
Frequently Asked Questions
Can I use hazelnut flour instead of grinding my own?
Yes! Pre-ground hazelnut flour (hazelnut meal) works perfectly. You’ll need about 1 1/2 cups. Just make sure to toast it lightly in a dry pan for 3-4 minutes to bring out the flavor.
Can I substitute the hazelnuts?
Absolutely! Almonds, walnuts, or pecans all work beautifully. Toast them the same way and grind to a fine consistency.
Is this cake gluten-free?
Not as written, but you can substitute the all-purpose flour with a 1:1 gluten-free baking flour blend. The results should be very similar.
Can I make this as cupcakes?
Yes! Fill cupcake liners 2/3 full and bake at 350°F for 18-22 minutes. This recipe makes about 18 cupcakes.
My hazelnuts won’t skin completely. Is that okay?
Perfectly fine! A little skin adds flavor and won’t affect the texture. Just remove what comes off easily and don’t stress about the rest.
Can I reduce the sugar?
You can reduce it by up to 1/4 cup, but the cake will be less sweet and may have a slightly different texture. The sugar also helps keep the cake moist.
The Bottom Line
This Easy Hazelnut Cake proves that simple ingredients can create something truly special. With its rich, nutty flavor and tender crumb, it’s a cake that works for any occasion—from casual weekend baking to elegant dinner parties. The beauty of this recipe lies in its versatility: enjoy it plain with coffee, dress it up with ganache for celebrations, or transform it into a layered masterpiece.
Once you taste the deep, toasted hazelnut flavor in every bite, this cake will become a go-to recipe in your baking rotation. It’s easy enough to make on a whim but impressive enough to serve to guests. Give it a try this weekend—your kitchen will smell amazing, and your family will be asking for seconds!