The Ultimate Oreo Milkshake Recipe: A 5-Minute Nostalgic Treat
A Sweet Memory in Every Sip
I’ll never forget the summer I turned eight—sitting at my grandma’s kitchen counter, watching her crush Oreos into a blender with vanilla ice cream. The sound of the motor whirring, the chocolatey aroma filling the air, and that first creamy, cookie-filled sip? Pure magic. Now, decades later, I’m still making this easy Oreo milkshake recipe whenever I need a quick pick-me-up or want to surprise my kids with an after-school treat they’ll remember forever.
What Makes This Oreo Milkshake So Special
This isn’t just any milkshake—it’s a thick, creamy, cookie-loaded dessert drink that tastes like your favorite childhood memory blended into a glass. What sets this recipe apart is the perfect ratio of cookies to ice cream, creating that ideal balance where every sip has chunks of Oreo goodness without being too thick to drink. Plus, it takes just 5 minutes from start to finish, making it the perfect easy dessert recipe for busy families or anyone craving an indulgent American classic. Whether you’re looking for a quick sweet treat, a party dessert idea, or just want to feel like a kid again, this homemade Oreo milkshake delivers every single time.
Ingredients You’ll Need
For the Base:
- 4 cups high-quality vanilla ice cream (about 1 pint), slightly softened
- 1 cup whole milk (cold)
- 12 Oreo cookies (regular or Double Stuf)
- 1 tsp pure vanilla extract
For Topping (Optional but Recommended):
- Whipped cream (homemade or store-bought)
- 2–3 additional Oreos, crushed
- Chocolate syrup drizzle
- Maraschino cherry
")
Pro Ingredient Tip: The quality of your ice cream makes ALL the difference. Choose a premium vanilla with a high cream content for that ultra-rich, thick consistency that makes this milkshake absolutely irresistible.
Step-by-Step Instructions
Step 1: Prep Your Ingredients Remove your ice cream from the freezer and let it soften on the counter for about 5 minutes. This makes blending SO much easier and gives you that perfect creamy texture without overworking your blender. Break 10 of your Oreos in half—save 2 whole cookies for garnish.
Step 2: Start Blending Add the vanilla ice cream, cold milk, and vanilla extract to your blender. Start with a low speed to combine everything without splattering. This creates your creamy base that’ll hold all those cookie pieces perfectly.
Step 3: Add the Oreos Toss in those 10 broken Oreos. Here’s where the magic happens! Pulse the blender 5-6 times rather than running it continuously. This creates those perfect cookie chunks we’re after—not a completely smooth shake, but one with delicious texture in every sip.
Step 4: Check Your Consistency Grab a spoon and check the thickness. Your homemade Oreo milkshake should be thick enough to coat the back of a spoon but still flow when poured. Too thick? Add 2–3 tablespoons more milk and pulse once. Too thin? Add a scoop of ice cream and blend again.
Step 5: Serve Immediately Pour your milkshake into tall, chilled glasses. This is important—cold glasses keep your shake from melting too quickly!
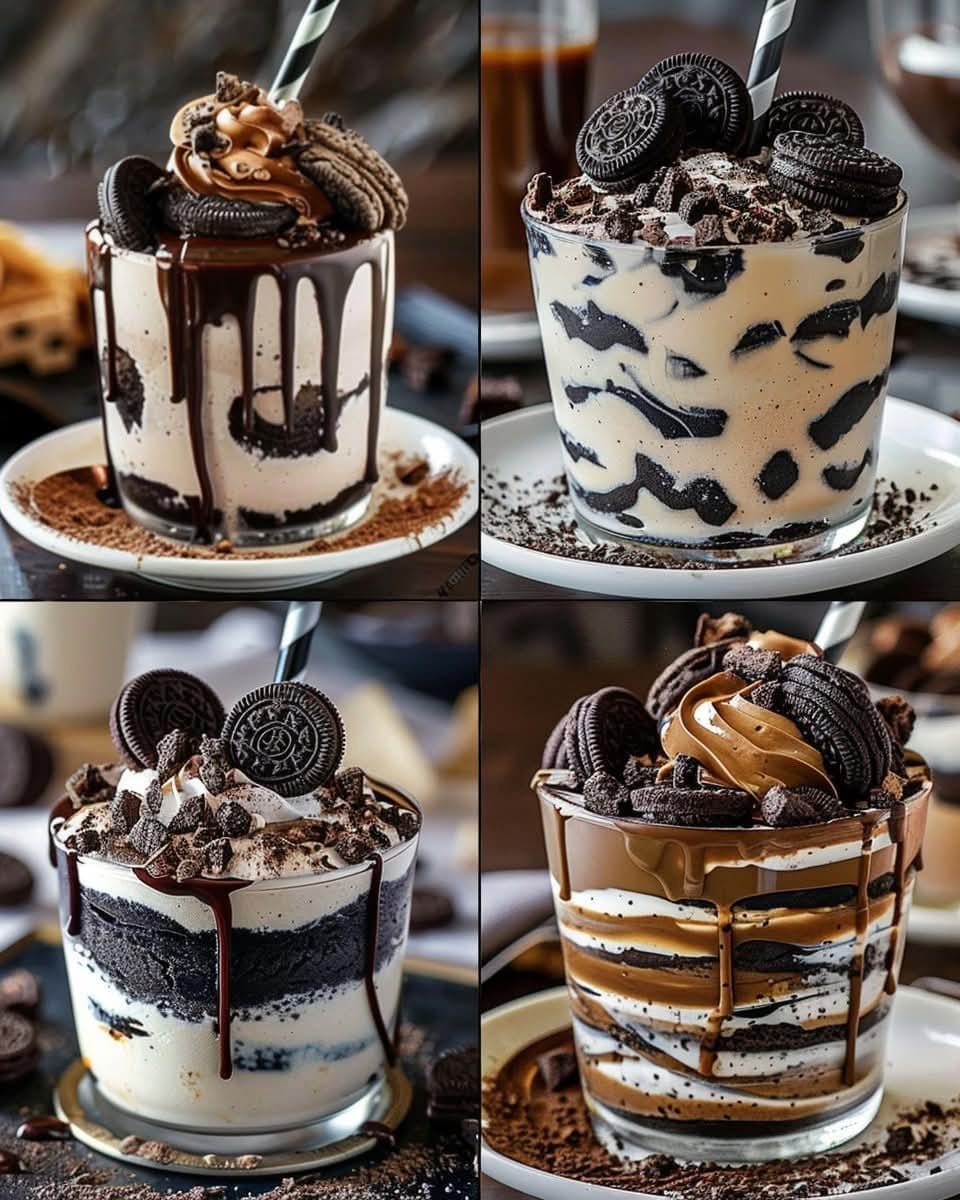
Step 6: Add Those Beautiful Toppings Top with a generous swirl of whipped cream, crush those remaining 2 Oreos over the top, drizzle with chocolate syrup in a zigzag pattern, and finish with a cherry if you’re feeling extra. Stick in a thick straw and maybe a long spoon—you’ll want both!
Chef’s Notes & Pro Tips
The Thickness Secret: Professional ice cream shops often add a stabilizer, but at home, your secret weapon is the ice cream-to-milk ratio. Start with less milk than you think you need—you can always thin it out, but you can’t un-thin a watery milkshake!
Cookie Distribution Hack: Want cookies in every single sip? After your initial blend, add 2–3 more roughly crushed Oreos and pulse just once. This gives you both the blended cookie flavor AND those satisfying chunks throughout.
Make It Extra Indulgent: Swap 1/4 cup of the milk for heavy cream. Trust me on this one—it creates an almost ice cream shop quality richness that’ll have everyone asking for your secret.
Flavor Variations to Try:
- Mint Oreo Milkshake: Use Mint Oreos and add 1/4 tsp peppermint extract
- Peanut Butter Oreo Milkshake: Add 2 tbsp creamy peanut butter
- Coffee Oreo Milkshake: Replace 1/4 cup milk with cold brew coffee
Storage Tip: While this easy American dessert is best enjoyed fresh, you can freeze leftovers in an airtight container. Let it thaw for 10 minutes and re-blend before serving.
Kid-Friendly Success: Let your little ones help crush the Oreos in a sealed bag—they’ll love whacking them with a rolling pin, and it’s a great way to get them involved in the kitchen!
Nutrition Facts
Per Serving (Makes 2 large milkshakes):
- Calories: 520
- Total Fat: 24g
- Saturated Fat: 14g
- Cholesterol: 75mg
- Sodium: 280mg
- Total Carbohydrates: 68g
- Dietary Fiber: 2g
- Sugars: 52g
- Protein: 9g
Note: Nutritional values are approximate and will vary based on specific brands used and optional toppings added.
Your New Go-To Dessert Drink
There’s something truly special about a homemade Oreo milkshake that just can’t be replicated at a restaurant. Maybe it’s the love you put into making it, or maybe it’s knowing exactly what goes into every sip—but I promise you, once you make this easy 5-minute milkshake recipe, you’ll never want the store-bought version again.
This recipe has become a beloved tradition in my home—Friday night movie treats, birthday party hits, and those random Tuesday afternoons when we all just need something sweet to smile about. The best part? You probably already have everything you need in your kitchen right now.
I’d love to hear from you! Did you try this recipe? What’s your favorite milkshake flavor combination? Drop a comment below and let me know how it turned out! And if you’re feeling creative, share a photo of your Oreo masterpiece—I always love seeing your delicious creations.
Pro tip for next time: Try making this with different Oreo flavors like Birthday Cake, Peanut Butter, or even the seasonal varieties. Each one creates a completely new dessert experience!
Happy blending, friends! 🥤✨